T
he quote “a picture is worth a thousand words” dates back to 1911, but it’s just as true today, as long as the “picture” encompasses photos and videos. Even a writer must admit that no adjectives can capture an atmosphere — whether it’s a cozy, candle-lit bistro, the view from a hotel balcony onto an ocean sunset, or the serene beauty of a wedding venue surrounded by cherry blossoms — as powerfully as even the simplest iPhone camera.
That’s why it’s so important for hospitality marketers to have updated images and videos of their destination to share across platforms. But getting the shots doesn’t have to be a chore, particularly if you keep in mind that authentic, human content has become increasingly valued in the age of AI. Don’t be afraid to focus on charming flaws (like a crumbling statue in the courtyard), genuine moments (a child splashing his brother in the pool), or even rainy days (because, let’s face it, they happen!).
Here, we offer up a short-and-sweet guide to the basics of iPhone photography, to help you overcome perfectionism and feel more confident when gathering visual content of your property or destination.
1. Look for the Light
Before you take a picture, ask yourself: What is drawing your eye? Our gaze is typically pulled to the brightest spot in a scene, so work with it, and make that light your central focus. You might want to capture the light itself — sunbeams on water, for example — or direct the light onto your focal point, whether that’s a person, place, or thing.
- Get the light in their eyes: In portraits, you want to see light in the subject’s eyes; if the sun is too bright, have them step into shade, while still facing the light. Indoors, consider placing your subject near a window.
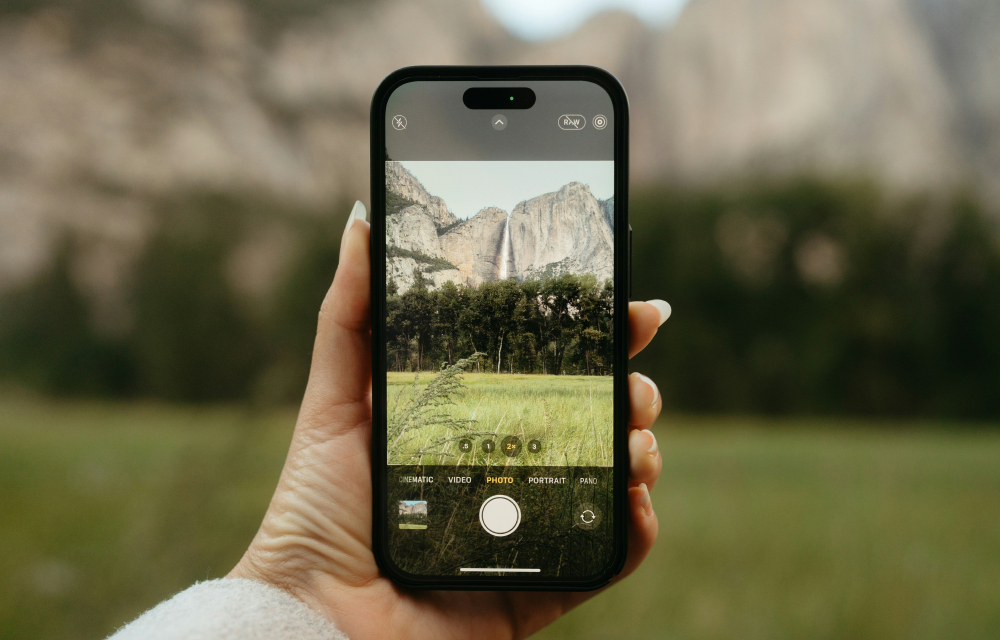
- Be there at the right time of day: The golden hour (the hours just before sunset and just after sunrise) casts everything in a warm, golden glow, and is an ideal time to photograph landscapes, nature, and architecture. By contrast, overhead light, like ceiling fixtures or the midday sun, creates harsh shadows.
- Avoid competing light sources and qualities: Turn off indoor lights when you’re shooting by a window, or pull down the window shade if your room or subject is lit by a lamp. Here are more tips for shooting interior spaces.
2. Do a Background Check
How many great photos have been ruined by a tree limb growing out of someone’s head, or a telephone pole bisecting a glorious landscape? While some background blunders can be fixed in editing, it’s better to avoid them up front so there’s less work to do later.
- Check, please: Before shooting, look behind your subject and at all four corners of your image with an eye toward distractions.
- Sidestep the issue: You don’t necessarily have to move your subject to eliminate the intrusion; instead, slightly shift the framing by stepping to the side, kneeling, or zooming in.
- Stay simple: If you’re taking portraits, keep your background as simple as possible — a brick wall or weathered barn siding, for example, works better than busy scenes or detailed decor.
3. Find the Right Angle
If you have an iPhone Pro or Pro Max, you’ve got access to a telephoto lens, which is more flattering than wide angle for portraits in particular. Go for a wider angle when you want to focus on a larger scene or place a person within a specific background, like a gardener against a field of daffodils, or a chef in her kitchen.
- Try shooting from different perspectives: Look up, shoot from above, get low, get high. Frame a shot and then move your phone just a couple of inches to see what’s changed and if it’s more interesting.
- Keep an eye out for natural framing devices: Try shooting through archways, through doorways, or between leafy boughs.
- Play with different iPhone modes and apps: Portrait mode brings your subject into focus by gently softening the background. To activate burst mode, hold down the shutter button to quickly take multiple photos; this is ideal for getting lots of group shots or capturing a subject in motion. Play around with different apps, too, such as Slow Shutter, which gives your photos artsy effects like light trails, blurred motion (great for traffic or moving water), and double exposures.
4. Use the Rule of Thirds
With iPhone photography, composition is everything, and there are two settings designed specifically to assist with alignment and balance. In the Settings for Camera, toggle on the Grid and Level options. The Level feature helps you take images and video straight on; it uses a light to indicate when your phone camera is level with the ground, helping you avoid content with tilted or uneven perspectives.
The Grid feature divides your image into a 3×3 grid, like a tic-tac-toe board, allowing you to more easily tap into the “rule of thirds.” This composition guideline dictates that the important elements of the photo should be placed along these lines or at their intersections, often with the primary subject in either the left or right third. Here are some ways to use it:
- Watch for lines: Place a horizon, road, or waterline along the bottom or top line of the grid to create a dynamic composition with a strong through-line.
- Place subjects to the side: Compose your shot so a person, building, or other focal point is in the right or left third of the image. With portraits, try aligning the person’s shoulders with a horizontal line and placing their face between two vertical lines.
- Experiment with the grid, but don’t lock yourself into it: While the rule of thirds tends to be pleasing to the human eye, it’s a guide, not a law.
5. Fix It in Post
Applying basic editing and processing techniques can take your images to the next level. There’s lots you can do right in the iPhone app, but other apps, such as Adobe Lightroom, offer you more control. Start with learning simple fixes, like how to make your photos lighter or darker, and how to fix a slanted horizon that’s throwing off the perspective of the shot.
Be warned, however: It can be easy to overprocess photos, so try these tips to keep your images authentic:
- Edit in stages: Do a little editing, then step away for a moment so you can get a fresh look when you come back.
- Pull it back: Process a photo to a point you like — and then pull back the effects by about a third to make sure you haven’t gone too far.
- Don’t go wild with filters: If you use filters to enhance color and contrast, such as VSCO Presets, use the same ones over time to maintain a consistent look and feel that represents your brand.
Where to Put Your Pictures
Once you’ve snagged your perfectly imperfect images and video, where to use them? Here are the most important ways to showcase fresh visual content on an ongoing basis:
- Authentic social media posts: Stiff and overly posed is out, real is in. Use your content to tell genuine stories — like profiling a beloved staff member — and to give followers a behind-the-scenes peek at daily activities, like event prep, flower arranging, or turning down a room.
- Inspiring call-to-action videos: To drive engagement and conversion, focus on the guest experience, not the property amenities. Here are a few examples. These can live on your website, embedded in blogs as well as on pages focused on specific topics. Use images and video to highlight a new seasonal menu or recent upgrades to your wedding venue.
- Enticing email campaigns: Almost anything you use on social media or your website can be translated into email for your list. Just remember to keep the mobile view in mind, as that’s the way most people consume content — for example, avoid using multiple images at the top of an email to reduce scroll depth.
Last but not least, keep the spark alive! Don’t take your iPhone for granted: Once upon a time, we couldn’t have imagined having a pocket-sized camera right there whenever we needed it. Instead of viewing content production as an endless churn, view iPhone photography as an opportunity to easily and effectively capture real moments. And if you need a bit of help deciding where these photos and videos fit into your marketing collateral, give us a shout.